How To Get Integrated
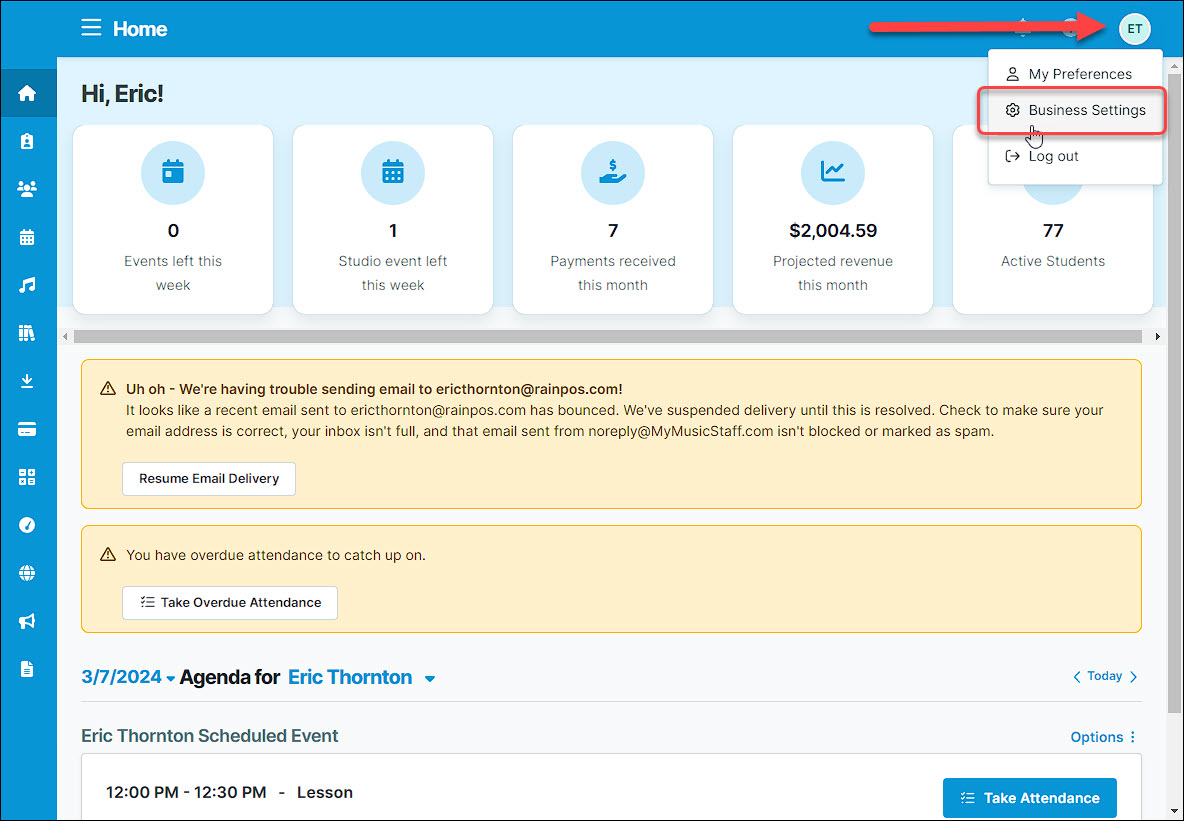
First, log into your MMS account. Once you have logged in, in the upper right go to Business Settings.
Once there, you will see some tabs across the top (including General, Membership, Accounts & Invoices, etc.). Scroll all the way to the right and find the Integrations tab and click on it.
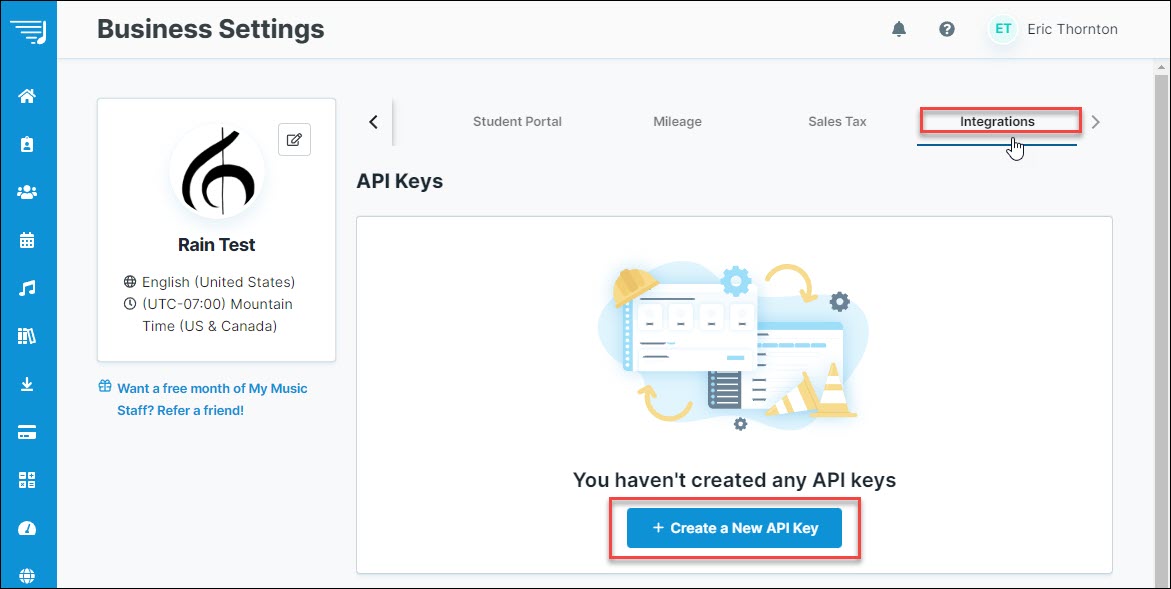
Find the API Keys section as pictured and click on the + Create a New API Key button. The window below will open:
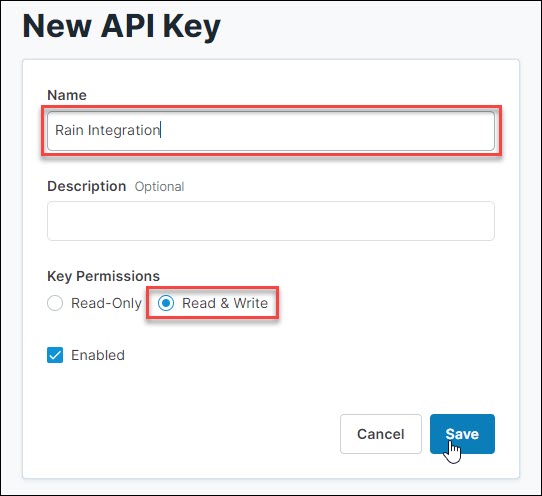
You will need to enter a name for your key, it doesn't really matter what you name it. You can enter a description if you like but it is not necessary. Make sure that the Key Permissions are set to Read & Write, that Enabled is checked, and then click Save.

You will see the Copy API Key window pop up and next to all the code is a small Copy button. Click on it and make sure the verification pops up:

Once you have it, click Done.
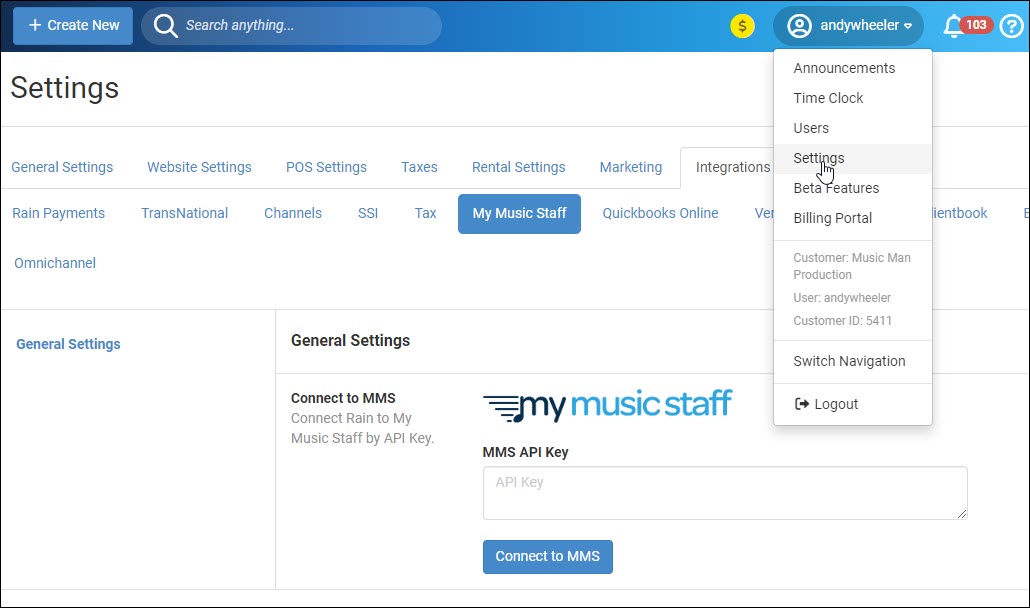
Next, you will log into to enter your API Key. Once you've logged in, go to your Admin button with your username in the upper right and go to Settings > Integrations > My Music Staff and you may see a screen like this:
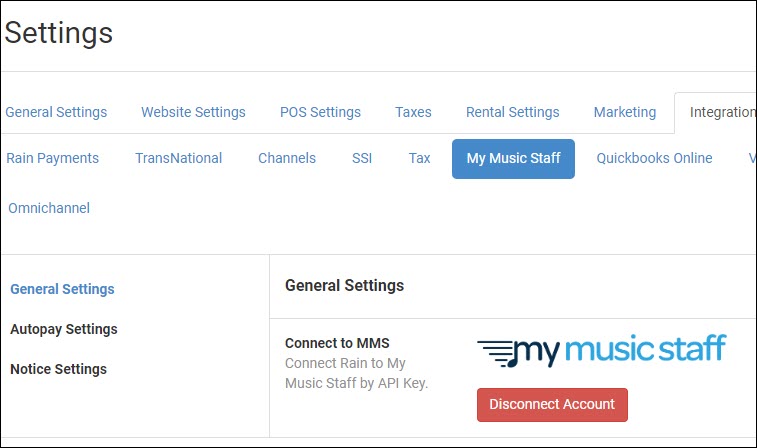
In setting up our Beta integrations, we used key tokens that were only good for a few weeks and then expired. So at this point if you see the Disconnect Account button you will want to click to Disconnect Account. Don't worry, you won't lose any of your synced data. Once you have disconnected or if you have not been connected before, you will see this:
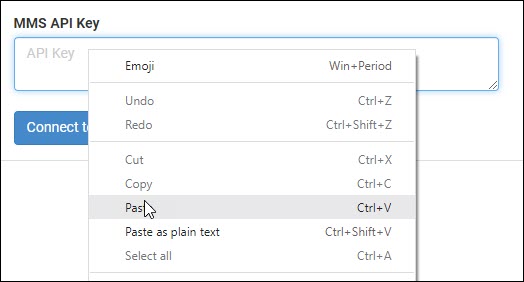
Click in the MMS API Key box and paste in what you copied. You can do this with a right-click from the menu, as pictured below, or if you are in Windows you can use the keyboard combo Ctrl-V, or if you are on a Mac, you can use Command-V.
Once your key code is in place, click Connect to MMS and the page will refresh and you'll see the Settings page reload. If you go back to the MMS tab, you'll see the Disconnect button (don't click it at this point) and your integration will now be permanent.
What Does the Integration Do?
MMS is a lesson scheduling solution that is very popular, and our integration between MMS and will allow you to manage your customer billing for MMS in . When the integration is activated, it will:
- Find customers that are in both systems and automatically synchronize them so that balances due and due dates will be usable in .
- Find customers in MMS that are not in and create & synchronize customer accounts in for them.
- Allow you to manually synchronize a customer from to MMS if needed.
- Allow you to take MMS payments for customers in the Register and look up the amount due as needed.
- Allow you to set Autopay preferences for MMS customers who want to have their MMS payments to be paid by recurring card billing.
- Allow you to set your email notification preferences for emails that go out to your MMS customers to let them know when their bill is coming due.
- See MMS payment amounts in Customer History and sales reports.
MMS Settings
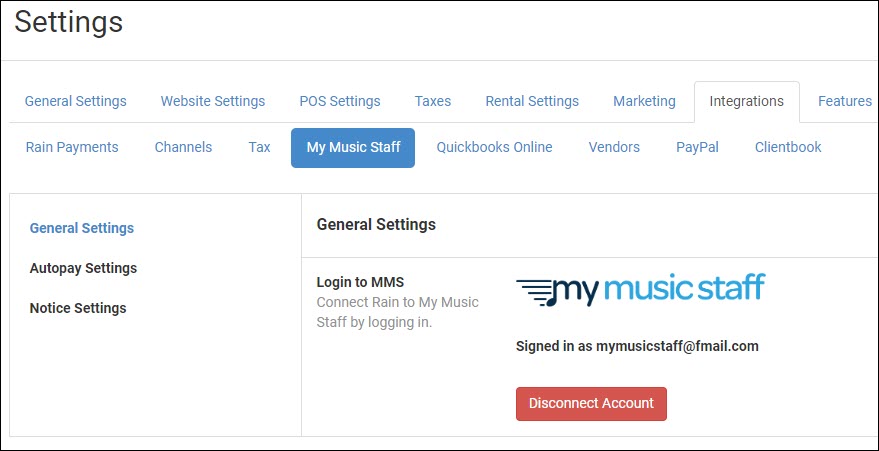
Once we have your integration configured, you will see some new functions in your system settings. Click on the Admin Button with your username in the upper right and go to Settings > Integrations > My Music Staff and you will see something like this:
Please Note: If you go to this area before the integration is in place, you will see an area to log into MMS. At this time, that area is not working and we will need to set up the integration manually from our end.
In the General Settings area, if you wish to disconnect your integration you can click to Disconnect Account. If you do so, at this time we would have to manually reconnect you again if you wanted the connection restored.
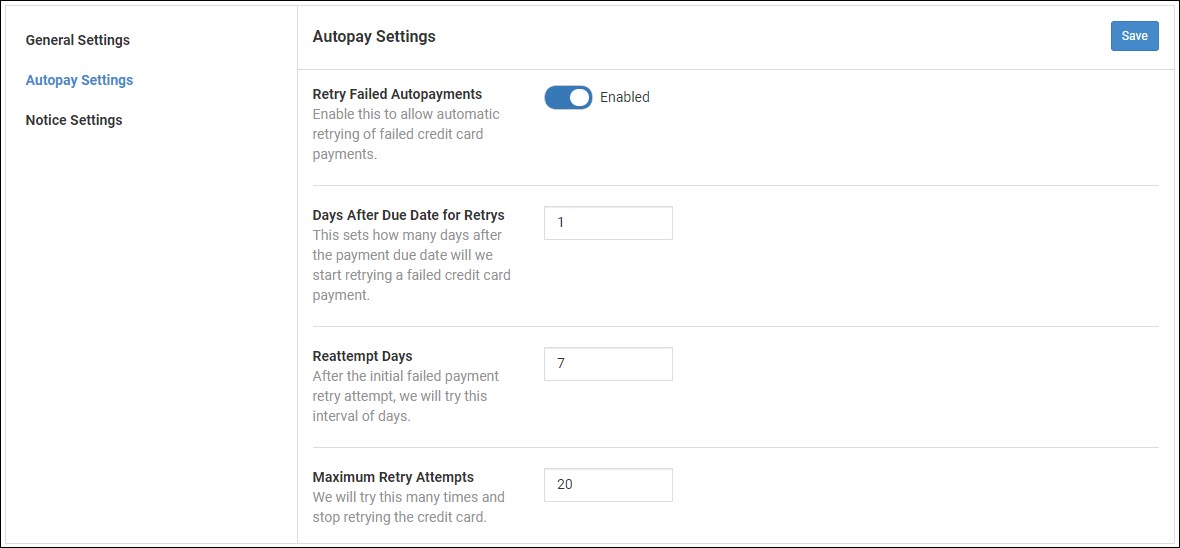
In the Autopay Settings area, you can configure how you want your Autopayments to work for customers who want a credit or debit card to be regularly billed for MMS lessons. You can click to Enable the system to Retry Failed Autopayments. You can set how many days you want the system to wait after the Due Date before it retries a payment in the Days After Due Date for Retries. If the retry fails, you can set how many days after that the system will wait to try again in the Reattempt Days area. And you can set how many times total you want the system to try to collect a payment before it stops by setting the Maximum Retry Attempts.
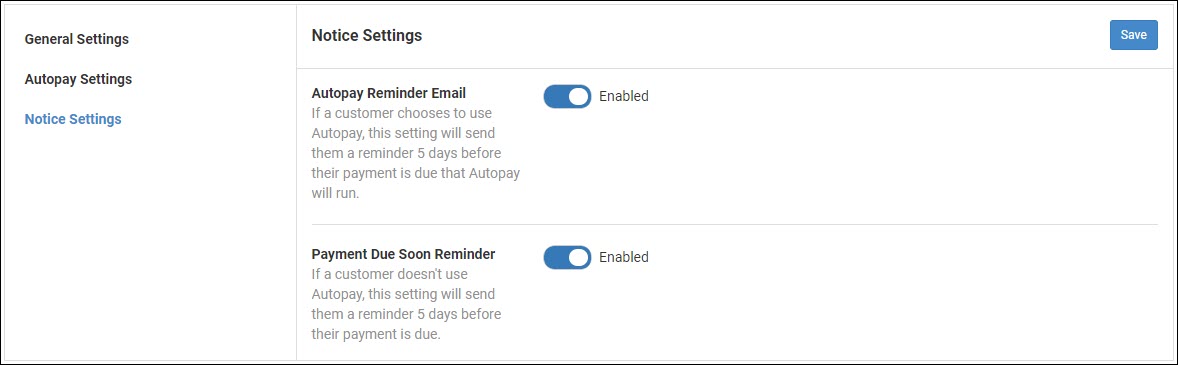
In the Notice Settings area, you are able to have the system send out payment notices to your MMS customers. If Enabled, the Autopay Reminder Email will send customers who are set up for Autopay a reminder email that their payment will be charged in 5 days. For customers who do not use Autopay, the Payment Due Soon Reminder will send them an email notice that their MMS charges are due in 5 days.
For all settings in this area, if you make any changes, click the Save button in the upper right.
MMS Customer Integration
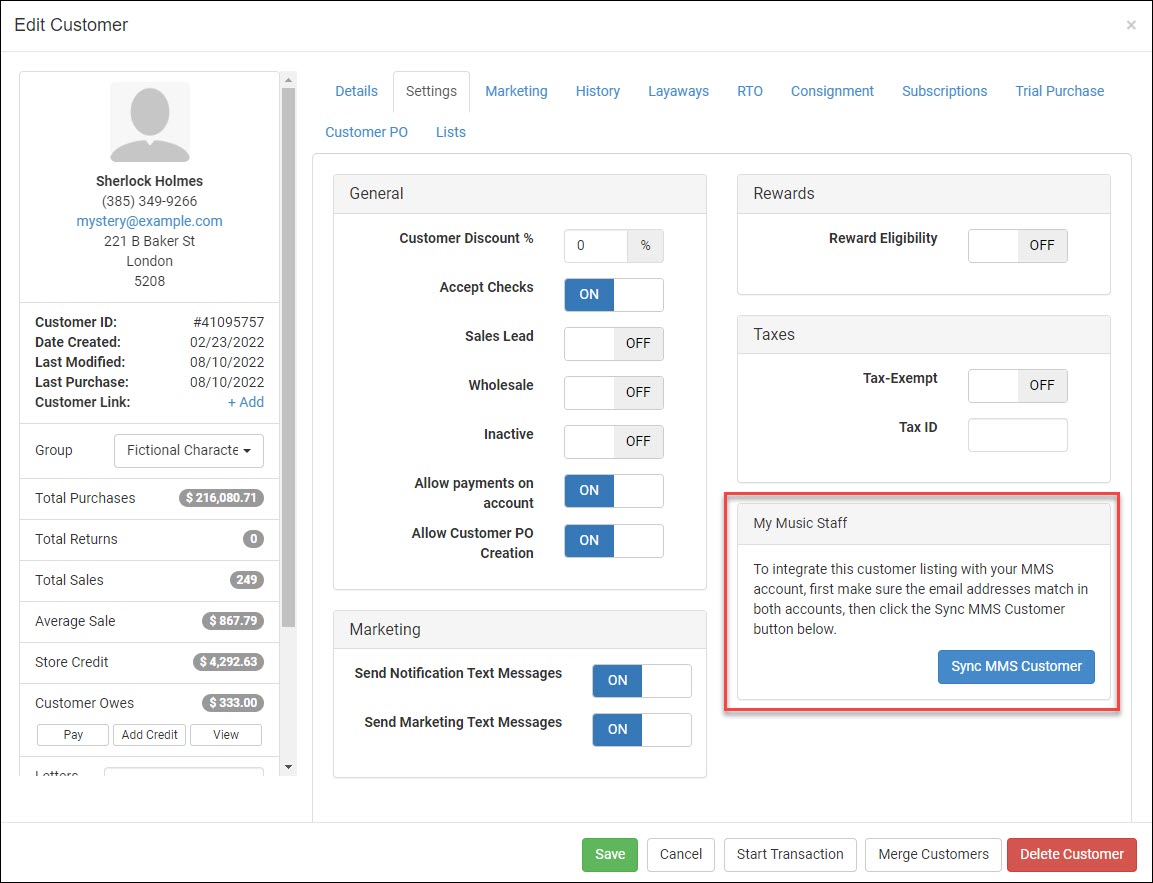
If you load a customer into the Register or go to Customers > Customers and open a customer from there, you will be able to see information about MMS integration on the Settings tab for the customer. When the integration is set up with MMS, it will automatically find and synchronize customers it finds in both systems. If you load or create a customer who is not yet synchronized, you will have the ability to Sync MMS Customer using the button pictured below, but that customer needs to already be in MMS and should ideally have an identical email address to sync properly.
Once a customer is synchronized, you will have the ability to Disconnect Customer if the need arises. You can also turn on Autopay for the customer, and as pictured below, if they already have one or more cards on file, those will be able to be used to pay their MMS charges in .
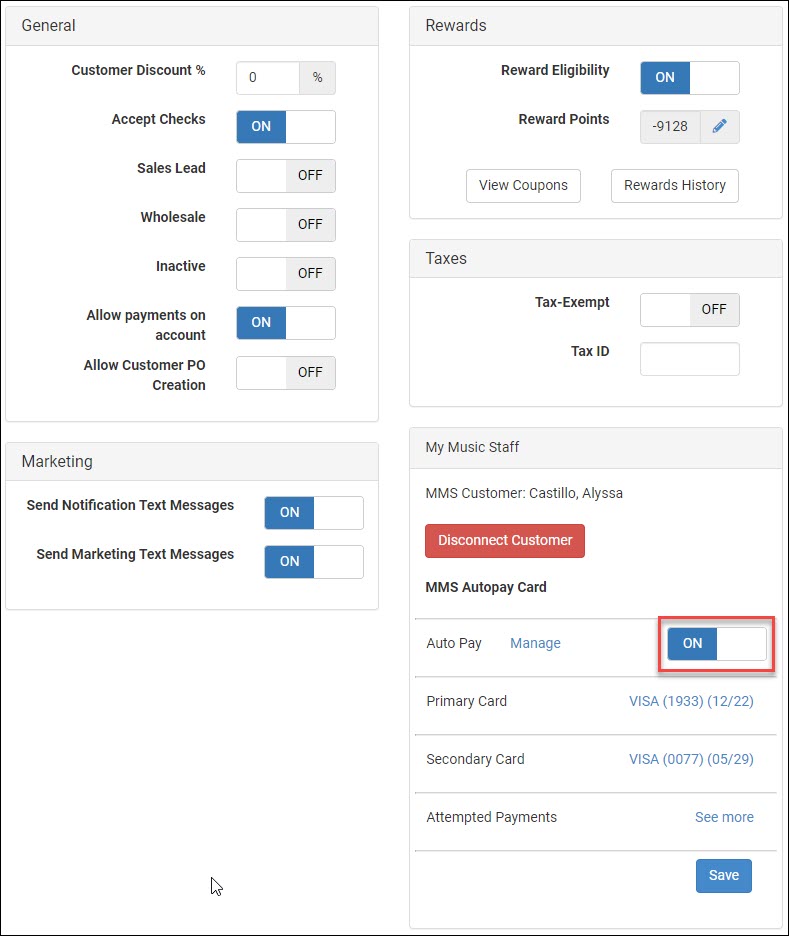
You can assign or reassign Autopay cards, or authorize new cards to be used for the account by clicking on the Manage link next to Auto Pay. You'll see a list of all cards saved in the system for the customer, and you can set one to be the Primary, and as many Secondary cards as they might want. The system will try to charge the Primary card first, and then will charge a Secondary card if the payment for the Primary fails. You can also remove a card from the list by clicking the Delete button for it on the right. The system will ask you for confirmation before deleting the card.
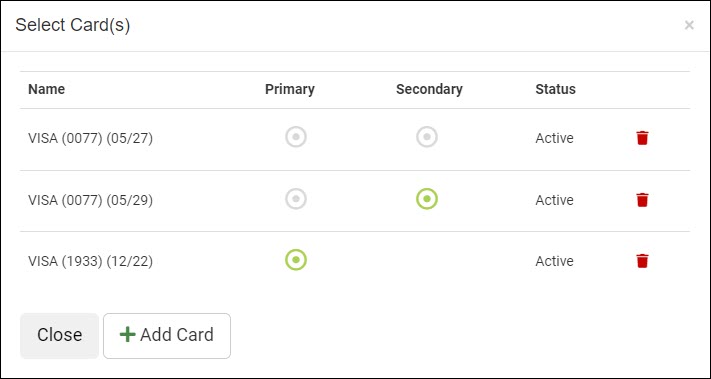
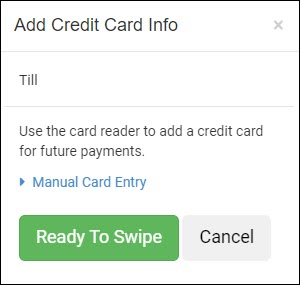
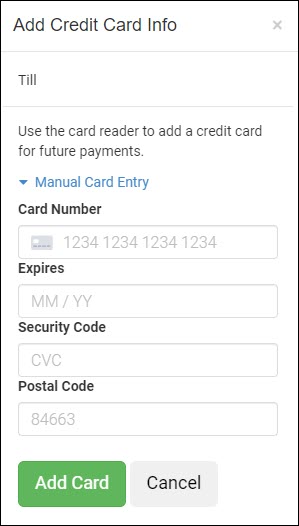
If you click the +Add Card button, you are able to either swipe in a card or you can click Manual Card Entry to manually enter one, as pictured below:
Also in the Autopay area, you are able to click See More to view the payment attempts.
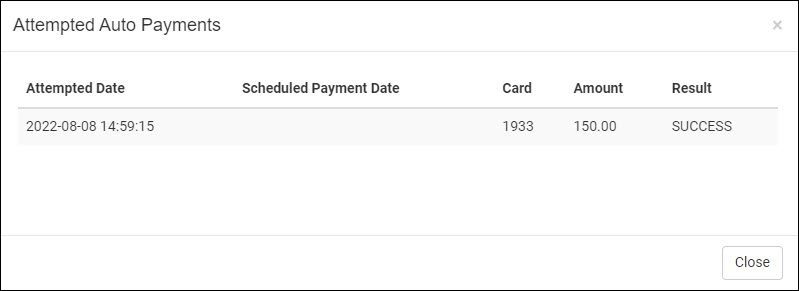
You will be able to see the date of the attempt, the date that the payment was scheduled originally, information about the last 4 digits on the card, the amount, and if the payment was a success or if it failed.
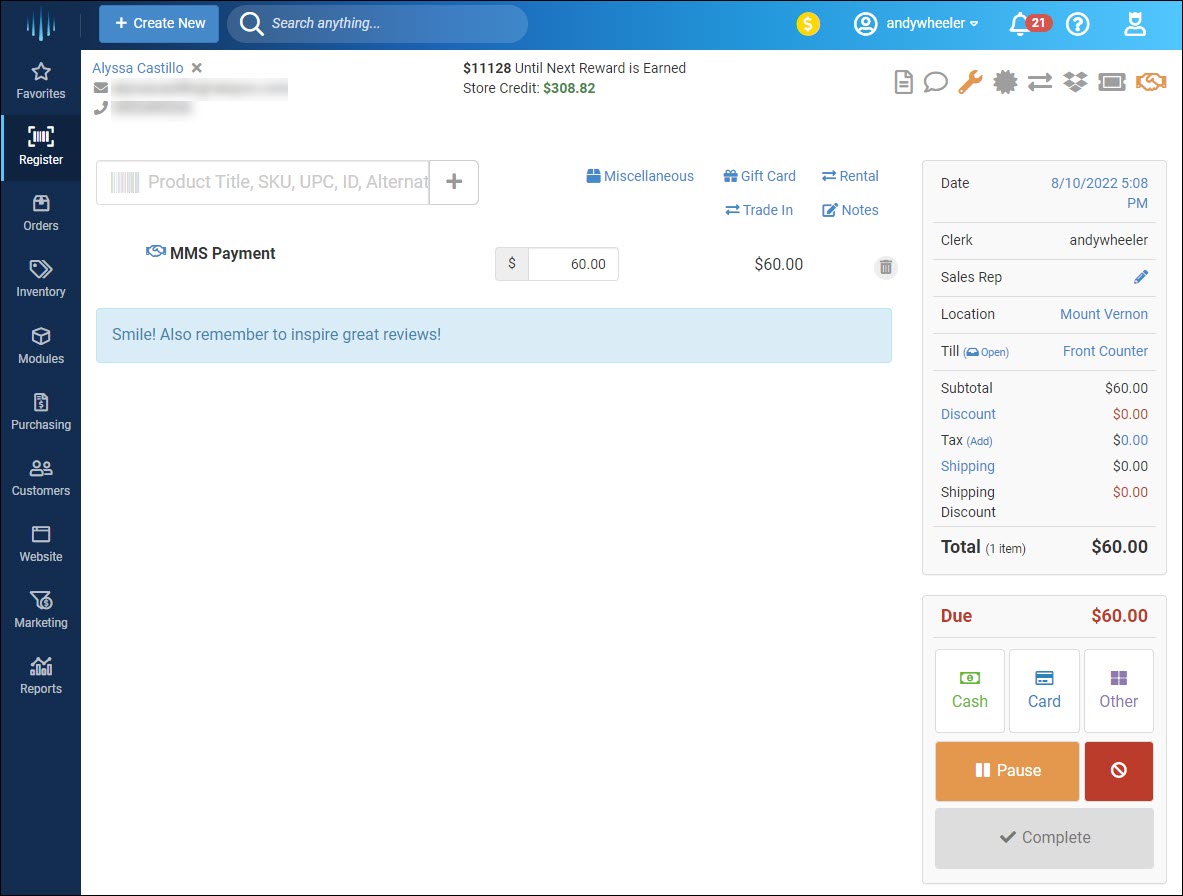
MMS in the Register
If you need to work with an MMS payment in the Register, you can load the customer into the Register and click any of the Customer Actions icons in the upper right to open that panel. You will see a section for MMS Account if the customer is synchronized.
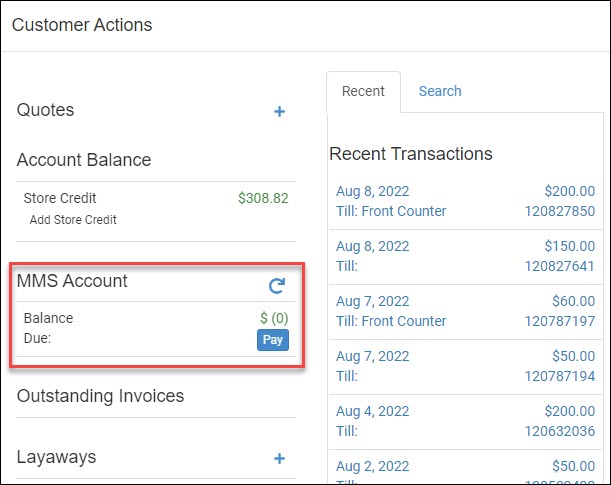
There is a Refresh button on the right if you are not seeing a Balance Due that should be displaying. A balance owed will display in red numbers and a credit balance will display in green. If the customer owes a balance and you click the Pay button, it will load the payment into the Register and show that it is an MMS Payment, and the customer can pay however they like in the normal way.
Payments made for MMS will display in your reports as MMS Payments and will be included in the system-managed Department of Classes when looking at departmental reports.


